
Video examples are available at the bottom of this article.
There are a few different options when merging invoices (or payments). Please note, once an invoice or payment is merged, it cannot be unmerged. The invoice can be Reset if the user needs to re-do the invoice.
Option 1 - Merging one invoice into another specific invoice
Select 1 invoice and select Merge from the dropdown menu on the Save button for that invoice:
At the popup screen, type in the invoice number you want to merge INTO. You do not need to check the box to Delete Invoice on Successful Merge:
Once the merge takes place, you will see zero number of jobs in the original invoice and an additional job in the merged-into invoice.
At this point, you can delete the original invoice which is now empty
Option 2 - Bulk merging invoices
Select one or more invoices that you want to merge
From the Bulk Actions menu, select Merge Invoices
Note: It is not necessary to select at least 2 invoices, even 1 will suffice, as any invoices selected will always merge to the most recently created invoice for the Customer that is in Invoiceable status.
If one of the selected happens to be the most recently created invoice, this will end up being the target (merge to) invoice, but it is not necessary to be selected. The instructions on the merge screen highlight those points.
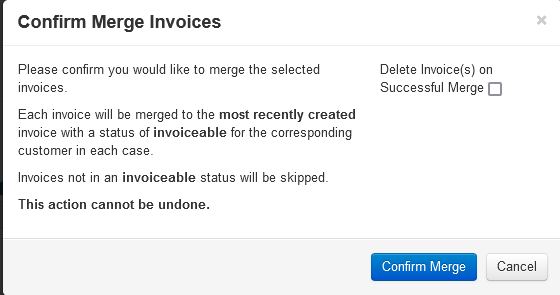
Delete Invoice(s) on Successful Merge checkbox - Optional
If checked, the older invoice will be deleted and its jobs merged into the more recent invoice
If unchecked, the older invoice remains in the list of Invoices and displays 0 jobs. This can be manually deleted.
The merged invoice jobs are now in the most-recently created invoice that is in invoiceable status. The original invoices show 0 jobs and can be manually deleted.
Final Step
Once the invoices are merged, click on the merged invoice. From the Save button dropdown, click on Refresh. This will ensure that all of the jobs and corresponding incidentals are grouped together.